How to use Vercel to configure DNS records for OVH emails
When managing your DNS from OVH, the DNS records are already configured to handle emails by default. However, when delegating the DNS management to Vercel, you need to reconfigure this yourself via Vercel.
To get started, open your Vercel dashboard and navigate to the Domains section. Then, click Configure on the domain you want to configure.
Configuring MX records
MX (Mail Exchange) records are DNS records that specify the mail servers responsible for receiving email on behalf of a domain. They direct email traffic to the correct server.
First, we need to MX records as recommended by the OVH documentation:
Warning
This is the documentation link for OVH in the French region. Make sure to switch the docs’ region to your region to get the right configuration.
Each MX record has a priority value. The server with the lowest priority value is tried first. If the server is unavailable, others are used by increasing priority order to ensure maximum reliability.
In Vercel, add new DNS records as follows (the example below is for the French region):
| Domain | TTL | Record type | Priority | Target |
|---|---|---|---|---|
| empty | 3600 | MX | 1 | mx0.mail.ovh.net. |
| empty | 3600 | MX | 5 | mx1.mail.ovh.net. |
| empty | 3600 | MX | 50 | mx2.mail.ovh.net. |
| empty | 3600 | MX | 100 | mx3.mail.ovh.net. |
| empty | 3600 | MX | 200 | mx4.mail.ovh.net. |
If we stop there, we might get a Relay access denied error when sending emails to our domain. This typically means that the mail server (here, OVH) doesn't recognize that it should be handling emails for the domain anymore. In the next section, we’ll see how to solve this.
Configuring SPF record
To avoid a Relay access denied error, we need to set up an additional DNS record called an SPF record. This tells email servers that OVH is authorized to handle email for our domain.
We can do this through Vercel's DNS settings by adding a TXT record with:
- Host:
@(or leave blank) - Value:
v=spf1 include:mx.ovh.com ~all
Testing our implementation
To ensure your configuration is working, I recommend using a tool like MX Toolbox. This allows us to check that the DNS changes have propagated across the relevant regions.
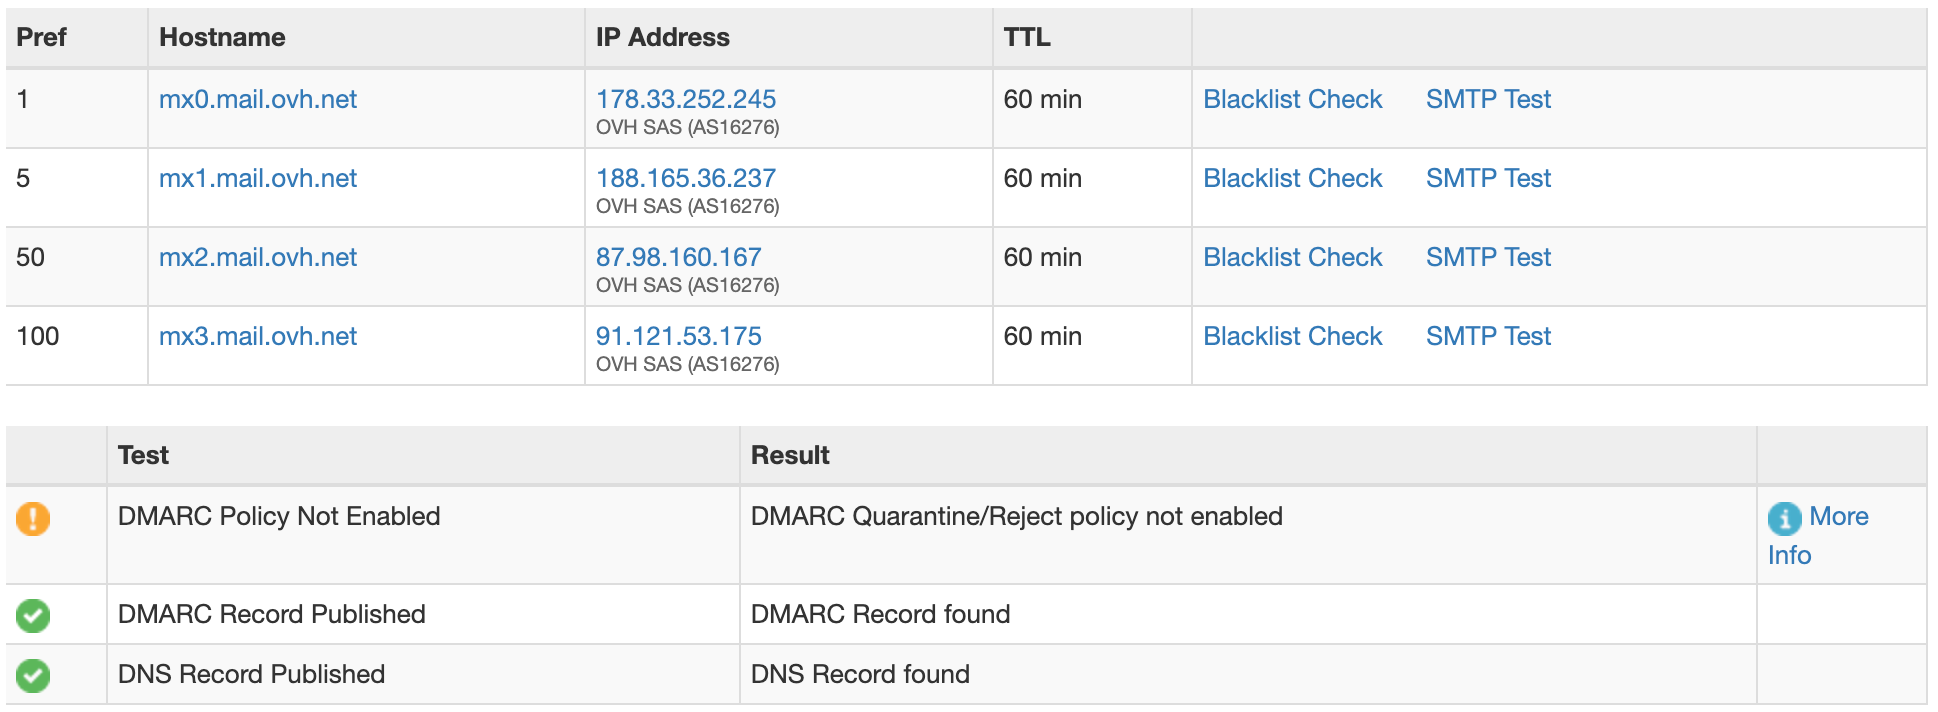
Open the MX lookup page, type your domain in the search bar and press the “MX lookup” button. You should see the DNS records that you previously filled. Additionally, MX Toolbox will let you know if the DMARC records are published and if you successfully enabled a quarantine policy.

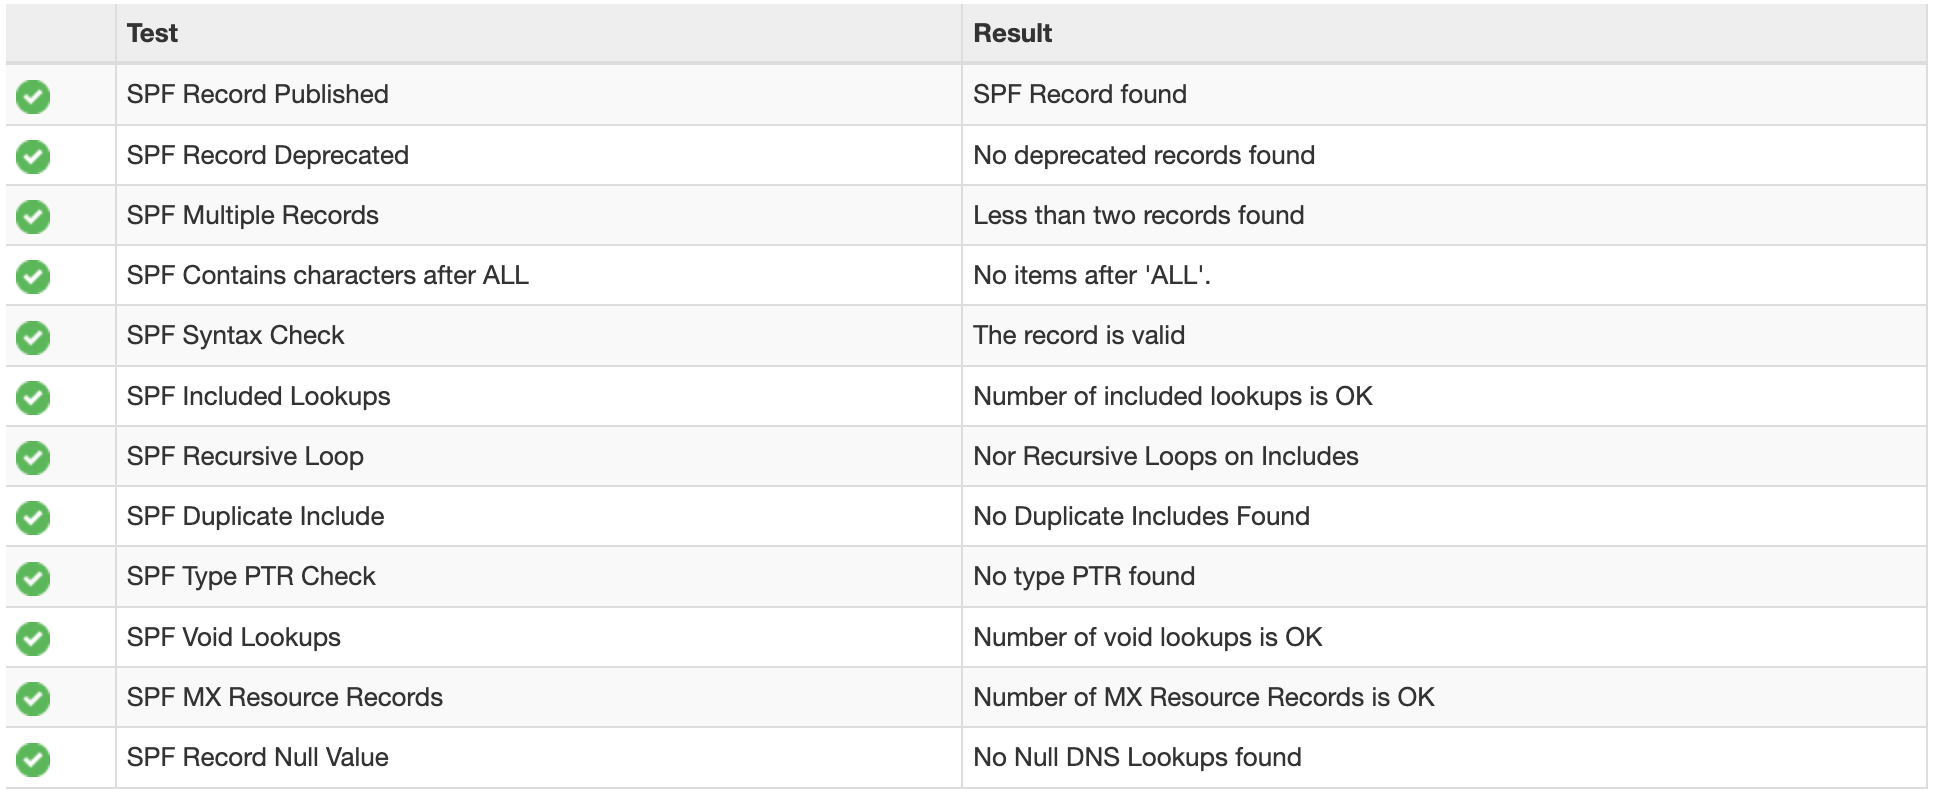
Below this table, you can click “SPF lookup” to run a SPF lookup. Alternatively, yo ucan use the dropdown next to the input bar to select “SPF record lookup”. After running the SPF lookup, you should see something like this:

If everything is green, it means your domain should be properly configured. You’re now all set!
Conclusion
I learned a bunch about how DNS work while setting my DNS records to configure my domain to send emails. I hope this article helped you learned too!